
Kissmoose Holiday Build
- tukaya
- Jan 17, 2017
- 4 min read
Things were, "cray, cray, crazy"! Further frustrations with builders and sponsors, I was losing my will to continue. Plenty of groundwork had being laid though.
In a brief inspired delirious moment of panic to get the project going by the holidays, I approached some wendy house builders for advice and requested quotes from them to build what was approximately the equivalent size of one of their doll houses/dog kennels on the back of a tuk-tuk. This seemed like a piece of cake and the cheapest way to do the shell. Soon enough it was made rather clear that what I was trying to do... was scaring people. Nobody was up for the challenge. The communications dried up rather quickly. Oops!

I was stuck again. I had explored many options and approached various builders in what had consumed so much time. I realised I would just have to let the project take on a life of its own. I really didn't want it to end up looking like a caravan, a food truck, or a wendy house. The tiny house movement being my biggest inspiration, I finally decided to take cues from their approach.

So we loaded it up and drove it to my Dad's workshop in Harries, where I knew I would get great advice and a helping hand getting the project started. We had been making toys in his workshop since we were kids. Many holidays were also spent building design projects for college, so I was pretty confident we could make some magic happen in the short amount of time we had.
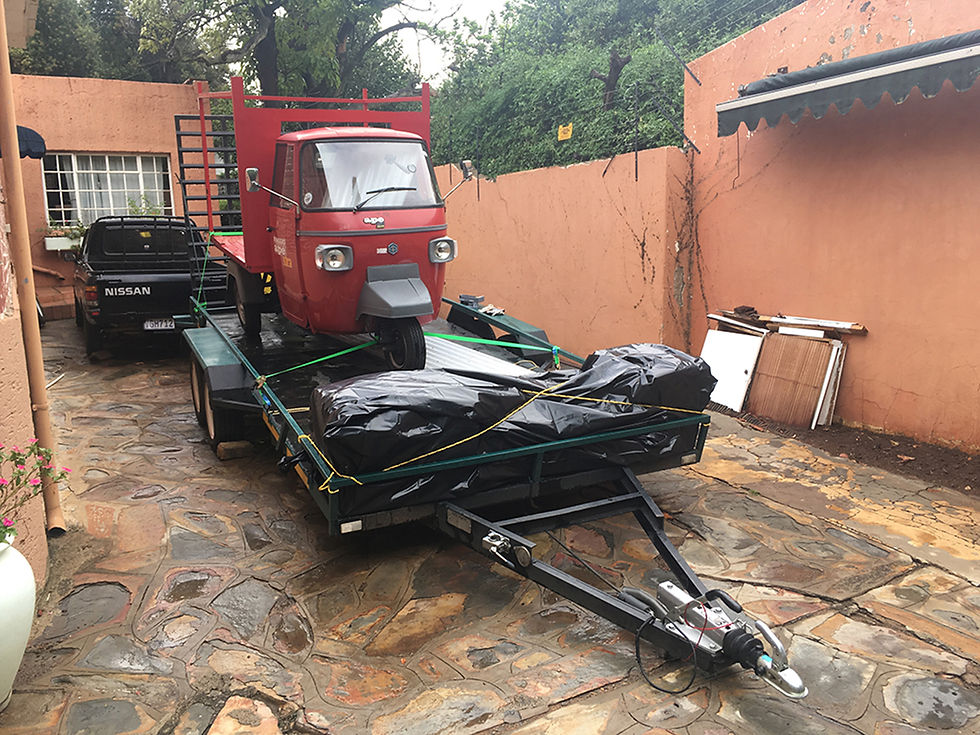
Salvaged materials and tuk-tuk loaded, we had a rather nervous drive down the country as the lights of the trailer had stopped working. We put the tuk-tuks hazards on and hoped for the best while passing all the traffic cops on the way home. Luckily it was mostly just strange looks and queries from random people when we stopped. Guess not many tuk-tuks are seen outside the cities.
After a briefing and run through of what I had in mind, it was time to get grinding. One can design something on a computer endlessly but eventually, you just gotta start somewhere and figure it out as you go.

It all starts with a solid base. My initial idea was soon scrapped for some chipboard and some old carpet tiles that had been ripped out of my Mums school from a previous renovation. The carpet tiles were perfect for reducing noise and friction between the structure and the metal of the vehicle. Some wood glue and a staple gun, we were good to go. The biggest consideration with the floor was that the engine compartment had to be accessible without having to remove the whole structure.

Using a thicker profile than I was planning to for the framing, as no stock was available and would take too long to order, we just had to go with making a rather sturdy frame. Suddenly a lot of panicked weight calculations were being made. Since the max load for the tuk-tuk is 500kgs excluding the rider, I really didn't want to go much over 250kgs as the weight slows the vehicle down from tortoise to snail pace on the steep uphills. Kinda takes the joy outta joyride when you got cars backed up behind you. Definitely gonna need a "Please overtake, Have a nice day" sign on the back. :-)
Our worst case estimation was sitting at 310kgs including all luggage and installed features. Some weight reduction strategies would have to be considered in the build process.
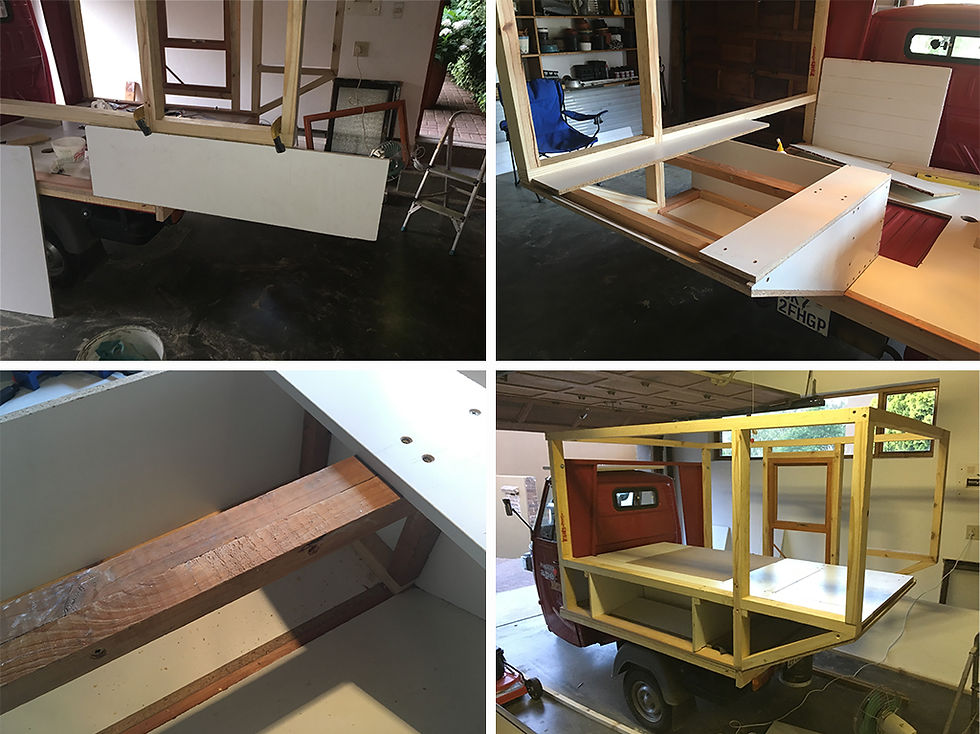
Framing is one of the most crucial parts of getting the structure right. Best to construct it on a flat/level surface and not on the vehicle. Good tips and advice taken from Andrew Morrison in his great online and DVD course on how to build a tiny home. You can check out his great site here. Tiny House Build.

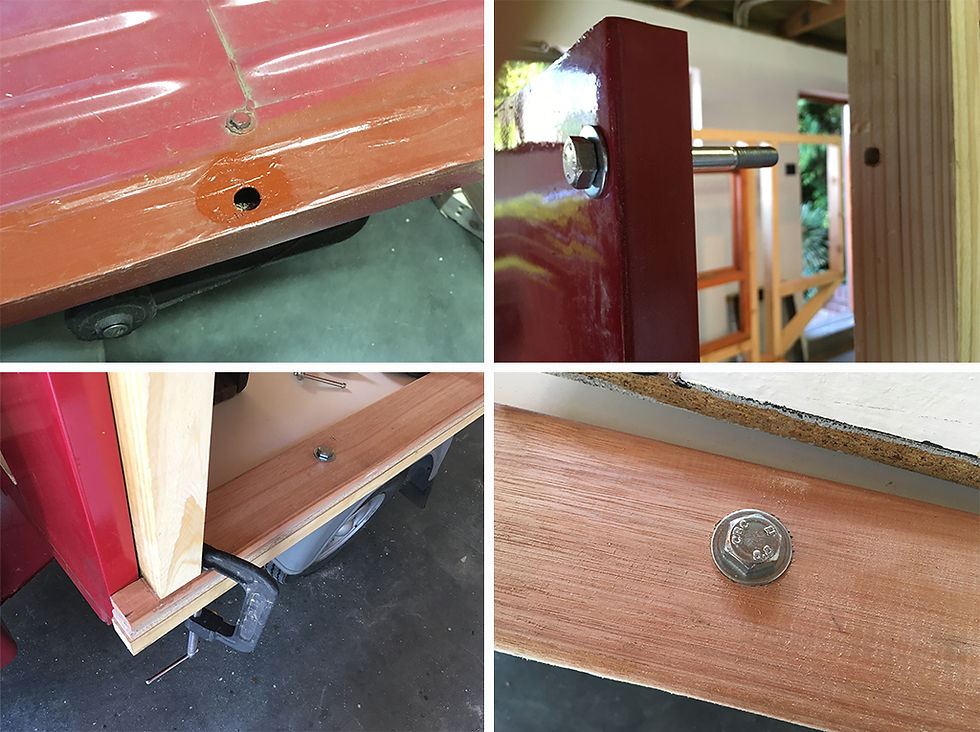
Next up was bolting the frame onto the chassis. We did it in a way that the structure could be easily removed from the chassis at the end of its use if needed. Once we had done this everything felt very solid and the tuk-tuks vibrations and noise levels dropped dramatically. High fives were exchanged and everything started feeling very real. Finally, the project was coming to life. The aches, pains and long hours were showing dividends.
With the frame up and bolted on, the ergonomics of the space were much easier to visualise than on a computer with my giraffe-like frame being over 6ft tall. My number one priority was to have a full size one piece single mattress. With a bad back these puzzle foam pieces that fit together in most caravans solutions might be fine for a weekend, but not for a whole year. This really limited my options in what I could do with the interior.
Fortunately, with the savings we had in height from changing the original floor plan, things I previously thought would not be possible were now suddenly just within reach. I was gonna have it all; a sofa/bed, mini dinette, benches, desk, kitchen and more storage, Booyah! However, this turned out to be the most difficult and tricky part to get together. Thankfully for some clever reinforcing and carpentry engineering from my Dad, we managed to pull it off. You just going to have to wait and see how it all works. :-)
Well, that's a wrap for the holidays. Thanks, Dad you legend, the workshop churned out the shell of one crazy dream with all your help and advice. Big thanks to Mom for being the support team, allowing us to work well fed and hydrated. Much Love.

What's next...
Insulation and panelling
Weight reduction
Like and share my Facebook page to follow the adventure. www.facebook.com/tukayaproject


Comments